My Life
NVIDIA Cuda and VirtualGL
by admin on Aug.08, 2010, under Linux, My Life
(Update: I’ve written the Wiki now and you can find it here.)
So I’ve been playing around with NVIDIA’s CUDA Toolkit and SDK and reading this book that just came out “CUDA by Example”. (See this Linux Journal article for some general back ground on CUDA.)
This is pretty interesting (and fun) stuff. So far I’ve gotten the toolkit installed and compiled the sample code projects in the SDK. I have to use my workstation at work as (sadly) my ancient ass NVIDIA card at home is not CUDA capable and my system is so old it is really just a type writer at this point.
Running just the sample CUDA projects is pretty impressive though. My old school GeForce 8800 at work has a meager 32 cores. (The card I just ordered has 96, and the most recent Fermi architecture ones have 448 and 6GB – yea, holy crap.) However, with only 32 cores it renders the particle, smoke and other samples quite nicely. These are rendered in 3D, allowing you to change perspective, and sometimes alter the particle density, light source, etc. They are just examples showing how to run general purpose code (and render results in OpenGL) on the GPU.
So then I thought – I would like to forward the rendered OpenGL images to my workstation at home. Alas, SSH, VNC, et. al all actually send the OpenGL to the client to be rendered. Enter VirtualGL, which does just what you would think – it attaches a loadable module to an executable which intercepts OpenGL requests and send them to the local GPU for rendering, putting the results into a pixel buffer which then gets sent to the client. Wow. You can run your rendering in a data center and forward the results anywhere. That’s nifty!
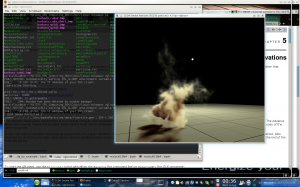
Here is a picture of the CUDA smoke particles sample, being rendered at work, and forwarded via SSH X Forwarding with rendering handled by VirtualGL. (I think Geek Level just dinged.)
I’m going to write up a wiki on this stuff, but if you have any recent NVIDIA card (8800 or newer) , even a mobile one, you likely have the capability to run CUDA. If you are interested you can download the Toolkit and SDK and have at it. (Update: I’ve actually written the Wiki now and you can find it here.
After testing the CUDA waters I have to say I am very impressed. I can easily see CUDA being integrated into many applications in the near future. There are already plugins to offload MS Excel formulas onto the GPU, run Mathmatica on it, etc. The integration of multi core CPUs, in even consumer class hardware, combined with the capabilities of GPUs very well might make things go from a “multi core revolution” in consumer computers and into a “massively parallel revolution”. In fact, it’s already happened. Massively parallel computing is now capable on your notebook, it just has not been fully exploited yet. (Think of the cryptographic fun you could have.) Of course once Apple catches on, it will be called iMassive.
This is just all pretty fascinating to me. My first computers had 4Mhz Motorola CPUs, 32K of memory, etc. and now I just bought a 98 core GPU which I can write code in CUDA C and run general purpose computations on. Wow. And I’m getting ready to get an i7 too – it’s all just a bit dizzying. But very fun.
If you have not checked out CUDA, I highly recommend it. It’s a good opportunity to learn more about massively parallel computing, which I think we are going to be seeing a whole lot more of. You can easily find the book “CUDA by Example” It requires basic to intermed iate C skills, but not OpenGL or other graphics languages at all – you learn CUDA C as you go and start writing parallel code very quickly.(Amazingly, the run time just integrates the GPU device code and host code, and you can invoke code to run on the GPU as easily as any C function. It is some hot stuff behind the scenes, but surprisingly easy to code.)
Florida Keys Heavy Metal Tour 2010
by admin on Jul.18, 2010, under Dive Trips, My Life
Heavy Metal Tour – 2009
Last weekend Syd and I went on a long anticipated wreck diving trip in the Florida keys. We completed our wreck and Advanced Open Water certifications two years ago, and were able to do one dive on the Spiegel Grove back in 2009. Since then we have done many other dives, and completed our Master Diver rating, but we have wanted to return to the Keys for some more wreck dives — a “Heavy Metal Tour”, and thus we jumped at the opportunity to do this trip with our friend Travis from Macs Sports in Clearwater. We had a series of unbelievable dives, managed to take some of our best diving pictures to date, dove two new wrecks, and had a wonderful time.
The Wreck Dives
We completed four wreck dives the first two days, then finished off the third day with two shallow reef dives. The wrecks included the USS Spiegel Grove, USCG Duane (twice) and the Eagle. Although we had planned on diving the Bibb too (a sister ship to the Duane), we were unable to obtain a mooring as the local fishermen had camped out ï¾ them, and so we did two dives on the Duane. All the wreck dives were deep dives (100′ +) on Nitrox (32 to 34 %ï¾ O2) , and ï¾ bottom times varied about :30 to :40 per dive. Visibility was 60’+ with water temp at 85 degrees and calm seas of about 1′ – in other words, the conditions were ideal. There was some moderate to strong current, most noticeable on the descent line. There was at least some penetration or swimthroughs on all the wrecks. The operator on all dives was Florida Keys Dive Center in Islamarada, and they provided well maintained boats and a professional crew. Our dive master was our buddy Travis who, as always, conducted a fun, adventurous and safe trip.
The Spiegel Grove (Day 1)
Our first dive was on the USS Spiegel Grove, diving with Joe, a dive guide from the dive shop. We decided to get a guide for this dive as this is a massive vessel – at 510 feet long there is a lot to see, and diving with someone who knows it well can really help optimize your bottom time. Our hope was to penetrate into the wreck a bit and do some exploring, as we did on our last dive on it. (Or last guided dive on the Spiegel included penetrating several rooms as passages and dropping into the hold at 110′).ï¾ Although we had a good dive on it, and did some swimthroughs, we did not get into the wreck as much as we had hoped. There were some less experienced divers tagging along who seemed to enjoy cutting us off in passages and being generally oblivious, so we had a pretty mellow dive – but don’t get me wrong, this is one stunning wreck no matter what, and there was still adventure to be had. The trip down the decent line was rather interesting as there was strong current, and you certainly had to pull your way down – if you let go you would find yourself a LONG way from the boat.ï¾ Once on the wreck the current was easier to contend with and we had a very good dive. Unfortunately we did not get too many pictures of this dive, but it was great to see this wreck again.
The Duane (Day 1)
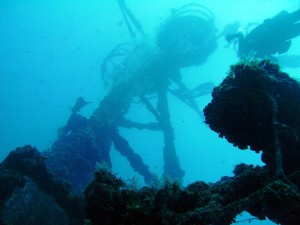
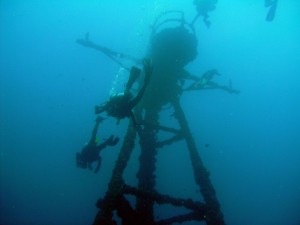
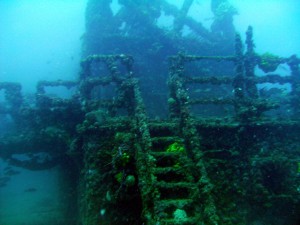
After our surface interval we were soon moored off to our next wreck, the USCG Duane. Like the Spiegel, this coast guard cutter was intentional suck, and is also resting straight on its keel, providing a stunning profile. With the deck at 100′ you can look up at the intact tower and crows nest, and it makes for a pretty amazing sight:
The wreck is covered in coral – the term “artificial reef” means exactly that, it truly is a reef with a great variety of marine life living on it and all around.
These wrecks create complete ecosystems and are teaming with life.
Of course, these pictures hardly do it justice. There is abundant life all around this wreck, a mountain of steel and coral to explore.
The current on this wreck was also quite strong on the descent line, but manageable on the wreck. Just where the descent line started there were a number of dives who seemed to be meditating peacefully, and quite motionlessly. One had lost a fin which I snagged as it floated past and returned it to him. After a few minutes of waiting we had to just move past them. Unfortunately in so doing I made an interesting discovery. Fire coral not only thrives on the wreck but apparently also enjoys a healthy existence on floats on the mooring line as well. Interesting. As I passed around the the divers and float I managed to contact the float with my forearm and upper arm. The sting was a bit strong immediately, and within a minute was throbbing nicely at depth, giving me something to look forward to. Oh well – I now know to give those floats much wider clearance in the future. (The scarlet rash got nice and sticky for a day or two, and then just itched good for a week and is now almost gone. Nasty little beastie that coral – amazing stuff really.)
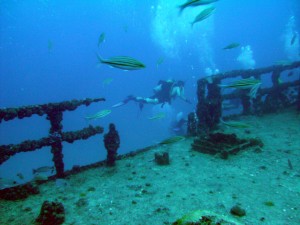
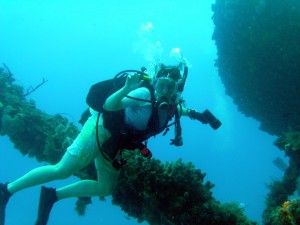
Once on the wreck we had a great time exploring it. It has such a great profile, and many rooms, windows and passages to look in – filled with fish and painted in coral, it is like a ghost ship that keeps luring you around new corners. We made several passes in and around the main decks of the superstructure. Syd caught this picture as I was advancing up the wreck port side:
The Duane is a great wreck dive, offering many swimthroughs, an intriguing profile, and lots of things to look at. You could dive this wreck many times and have nothing but new experiences on it.
The Duane (Day 2)
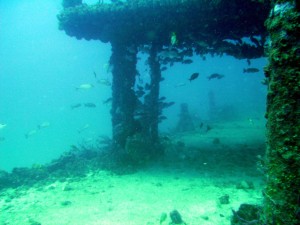
Since our plan to dive the Bibb had to be scrubbed, we returned again to the Duane for our first dive of the day. While we had looked forward to the Bibb as another new wreck, and the opportunity for a bit deeper dive at 130′ feet, it was hard to be disappointed to return to the Duane. This time we dropped onto her bow and worked our way toward the superstructure, where we explored for quite a while. We did several swimthroughs and once again got some excellent pictures:
After we turned the dive and headed back to the ascent line though it took everything you had to swim against the current. We almost dropped to the deck to hand-over-hand the way back along the edge, or try to get out of the current by getting out of the open water and skimming just above the deck, but we were able to make just enough headway to just angle up toward the line.
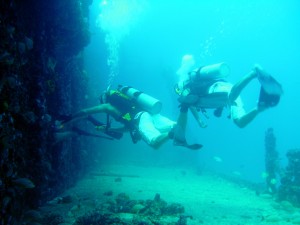
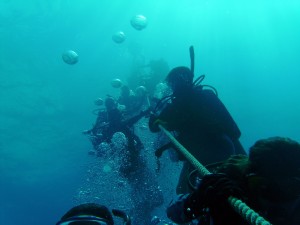
We had nice, slow ascents from both dive with deep stops at 50′ and then a normal safety stop at 15′ to 20′. Here is a group of divers all hanging out on the safety stop:
The Eagle (Day 2)
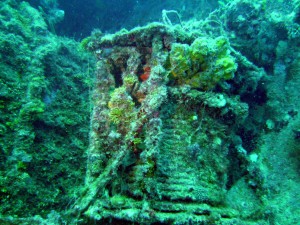
Or last dive on our wreck tour was the Eagle. Unlike the first two, this one sets on her side with her hull broken completely in half. This makes for an excellent figure eight tour allowing you to see all sides of her and offering several swimthroughs and places to explore. There were many great things to investigate, such as this wench, completely covered in corals:
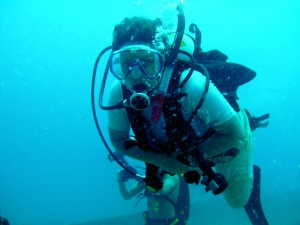
Here is a picture of Syd just before we started into exploring the Eagle – she would have brought the Explorers Club flag, but it was not feasible due to the current:
This ended the wreck diving portion of our trip, and we were completely happy with these dives. The conditions were very good, the dives offered good challenges, we got to use several different skills, and we even managed to come away with some respectable photos this time. Underwater photography, we have learned, is a fickle bitch – and either we are getting better, or just got lucky this trip.
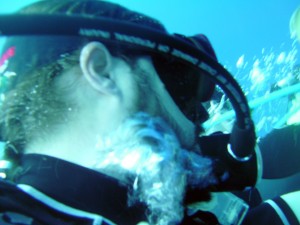
Here is a picture of Syd near the mast of the Eagle – note how thick the coral growth is on this wreck, the entire structure is covered in extensive growth such as this. The flashlight high intensity LED flashlight helps bring out the natural colors of the coral, even in the day light. At 100′ down, the colors are nearly gone.
Although our Heavy Metal Tour was over, our trip was not. This night we went out with our dive group, heading to Wahoo’s on Islamorada per Travis’ recommendation. It sites oceanside, with a wonderful patio providing the idyllic Florida Keys view. We sat with a wonderful couple we had just met on this trip and had a great time visiting with them. Having a beer on the deck on a summer evening after some awesome wreck diving was not a bad way to end off this part of the trip, and put us in a perfect mood for the reef dives yet ahead.
The Reef Dives
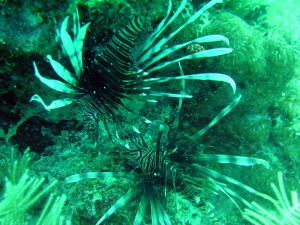
You sometimes can forget how beautiful these dives can be. Our diving through the winter and spring had all been inland cavern diving. Then you get back to the reefs and remember how amazing these ecosystems are. On our first dive, I was delighted to get a decent shot of three lion fish hiding under a coral outcropping. While lion fish are unfortunately an invasive specie in the Keys, and are a definite problem, I still love seeing them – it always amazes me watching them, they are so beautiful and exotic. One of my early goals as a diver was to see lion and stone fish, and I am still thrilled every time I do.
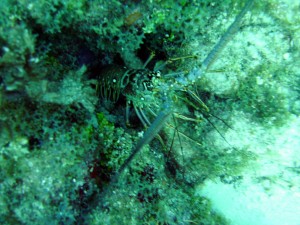
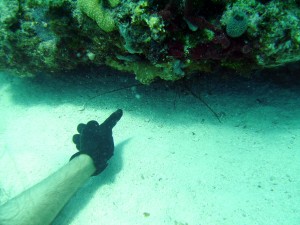
But that is not all we saw on these dives: Several eels (moray and spotted), and innumerable lobsters were also about. Here is a picture of me fencing with a big one. If you put your finger out and lure them toward you, you can get them riled up a bit and wanting to fight you. Ummm . . . tasty, tasty bugs. . .
There were tons of lobsters on these dives, hiding under coral ledges, in crevaces and even just out in the open. They are a bit fiesty, and you can get them to spar with you. When they have had enough though they can really move! Good thing these things are lower on the food change and smaller then us. (Think Alien vs. Predator vs. Lobster.)
The lighting improved on the second dive as the morning rain clouds drifted back to where ever they had come, letting far more light down to the bottom. This allowed Syd good opportunity to catch some pictures of a few of the tropicals and corals you get to see on these dives.
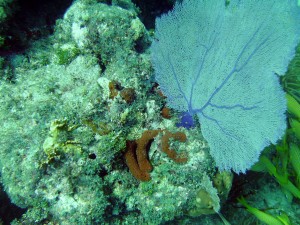
She really scored on getting some great shots, including this purple sea fan – it is hard to get a picture of these that maintains some of their beautiful color.
Tomorrows Dives
This was a great trip to the Keys, with excellent dives, good wreck diving practice, calm seas and great visibility. After doing these dives Syd and I are more interested than ever in doing some more wreck diving. We would love to do the newly sunk USS Vandenburg off Key West, and of course the USS Oriskeny air craft carrier near Tallahassee.ï¾ Perhaps someday we can even return to Micronesia and dive the Nuclear Fleet off Bikini atoll.
Thanks for reading, and we hope you like the pictures. If you like, leave a comment – we would love to hear from you.
HP C309g Wireless Linux Printing & HPLIP
by admin on Jul.17, 2010, under Linux, My Life
We have wanted a wireless printer for our home, and I’ve been waiting for the prices to become reasonable. Then last weekend we scored on a refurbished Photosmart Premium C309g-m at CompUSA. Normally $199, we got it with a -$120 instant savings for a total of $79 at the register. For a 802.11g + Bluetooth enabled, reasonable quality photo printer and scanner, $79 just was a damn good deal. Especially considering it uses separate CMYK cartridges – it’s exactly what we were looking for. Best. Price. Ever.
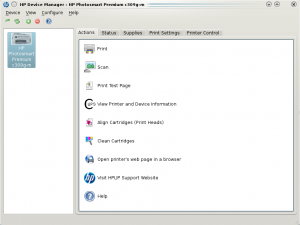
But the best thing about it really is the fantastic Linux drivers HP provides via the HP Linux Imaging and Printing (HPLIP) software. You can download the latest version at the official HPLIP site, but you might very well find it is already installed in your Linux distro, it commonly is these days. Just check to see if you have commands such as hp-setup, hp-wirelessconfig or hp-toolbox already. If not, see if hplip is available in your distors repository, or download it using the above link.
Once installed you will have an HP icon in your systray for quick access to your printer settings:
I first used HPLIP about two years ago at work and was delighted to see how complete it was. It provides a full set of tools to interface with HP devices from Linux and provides a delightful user experience.
On my device, which is a relatively new product, nearly all functions are supported: Wireless printing of course, photo printing (see tips below) and even wireless scanning – which really surprised me. Overall, using this printer in Linux- like many other HP products – is very well supported. Way to go HP!
I did however run into a few little issues which had to be worked though, and you may encounter the same. So here are some notes on what I did to resolve the snags I encountered.
Arduino E-aster Egg
by admin on Apr.18, 2010, under Linux, My Life
My Arduino arrived just a few days before Easter, and though I’ve been busy with work and school I couldn’t wait to dive into playing around with it. The whole concept of the Arduino, being able to write little programs in C, compile them, then upload then to this little programmable prototyping board – it’s just so cool.
I decided to start by following the great introductory tutorials at the Adafruit.com site, they are so well written and so fun. One of them consists of learning how to program three different LEDs to cycle on and off. By having more than one on at a time, and through using a box to diffuse the light, you can mix the colors to get yellow, purple ect.
Well, that looked like fun, and as I was constructing it I realized that it would be a perfect Easter Egg, the colors diffusing and illuminating it. I wired up the schematic, modified the sample source code to blink and mix as I wanted it to, compiled it and uploaded it to the Arduino. I made a little paper box and filled it with tissue as shown on the adafruit.com site. As I made the box I drew some easter egg style symbols, and some other stuff, on each face of the cube. Once fixed up it worked pretty darn good and I presented it to Syd as her E-aster Egg!
Here is a little ogg video of the finished project:
(If that does not work here it is in mpeg4 too)
If you would like to learn more about the Ardunio, see this wiki article which has some information on getting started and links to some great resources.
Syd really liked her digital colored egg. I’ll have to come up with some more projects to make for her, but I sure it won’t be too difficult to come up with ideas, the Arduino is a remarkably versatile little gadget.
Mares Icon HD Full Color Dive Computer
by admin on Apr.13, 2010, under Dive Trips, My Life
Wow, check out this new Mares Icon HD dive computer:
* Full color TFT LCD screen
* Built in digital compass
* Dive site map feature
* Very clear presentation of information
* Up to 3 Nitrox gas mixes
* RGBM algorithm
Current cost is about $1,100 US (non air integrated).
From reading on line it also seems the air integrated units will be out end of 1st quarter (now) or 2nd quarter 2010. No official word yet on future trimix support, but as the Uwatec Galileo Sol offers that I can’t imagine that this won’t as well. The Sol has looked pretty interesting, but honestly the Mares Icon HD looks damn good and just might be one of the best and most fully featured dive computers to hit the market yet. I also like that it uses the RBGM alorithum with deep stops, which I use on my original Nemo and have liked very much.
Watch the very cool demo of it here.
I love the sliding display showing position in the water column and how deep stops, deco and safety stops “slide” into position. What could be easier than that?
Here is one company making dive site maps specifially for it. (Though I imagine a simple command line application of image magick to make images the correct size would do quite nicely.)
Here is a review of it, and a decent scubaboard.com thread on it can be found here.
One thing I can’t help but think of is the possibility of a device like this that ran on an Android stack. The pros of course being that it could run apps and you would not be exclusively dependent on the manufacturer supplied software, the liability that more complicated software introduces the possibility of bugs and instability. Hummm . . . do you want to risk your life on a Java stack? Then again, if you could play Tux racer while on a deco stop, it just might be worth it.
